Having your own GPT is like having a “mini-you” by your side, helping you write outreach messages, whether for recruitment or prospecting.
This is exactly what a custom GPT can do.
This guide will walk you through, step by step, how to build your own AI model that specifically addresses the challenge of outbound messaging.
What is a custom GPT?
It’s an assistant that you configure in ChatGPT to perform specific tasks.
Basically, it’s a tailor-made assistant that you can adjust as you want with your own data.
The idea? To have your “personal assistant” who knows everything you know.
You can add documents (knowledge base) so that your bot can directly rely on your documentation and be even more relevant.
Two possible options:
- Create your own fully customized GPT.
- Choose a GPT already created by someone else.
There’s no limit. You can create as many as you want.
The added value of GPTs
The real power of GPTs is their ability to be customized for specific needs.
It’s an assistant that speaks your language, understands exactly your challenges, and can even anticipate questions from your prospects or candidates. You don’t have to adapt to a generic tool. It’s the one that adapts to you, to your profession, to your communication style.
When you customize your GPT, you push it to become an expert in a particular field. You refine it until it becomes as relevant as a real member of your team.
You set the parameters, and that changes everything.
5 benefits of a custom GPT
1. Message automation
Generates messages tailored to each recipient, without losing the personal touch.
2. Highly accessible
No coding skills required. The interface is simple, anyone can easily get started.
3. Creativity adapted to every need
Whether it’s answering questions, creating content, or helping with customer support, the GPT adapts to any context.
4. Fewer repetitive tasks
No need to rewrite prompts for similar tasks, automate everything.
5. Scalable
Your GPT is never static. Add data, adjust parameters, and watch it adapt.
How to create your GPT
Step 1: Access the design interface
Click on “Explore GPTs

The interface is divided into two windows:
-
Left window: “Create”
This is where you enter your information. The GPT builder asks you questions to build your chatbot step by step.
-
Right window: “Preview”
Here, you can test your chatbot live. Each adjustment appears instantly, allowing you to refine your bot as you go.
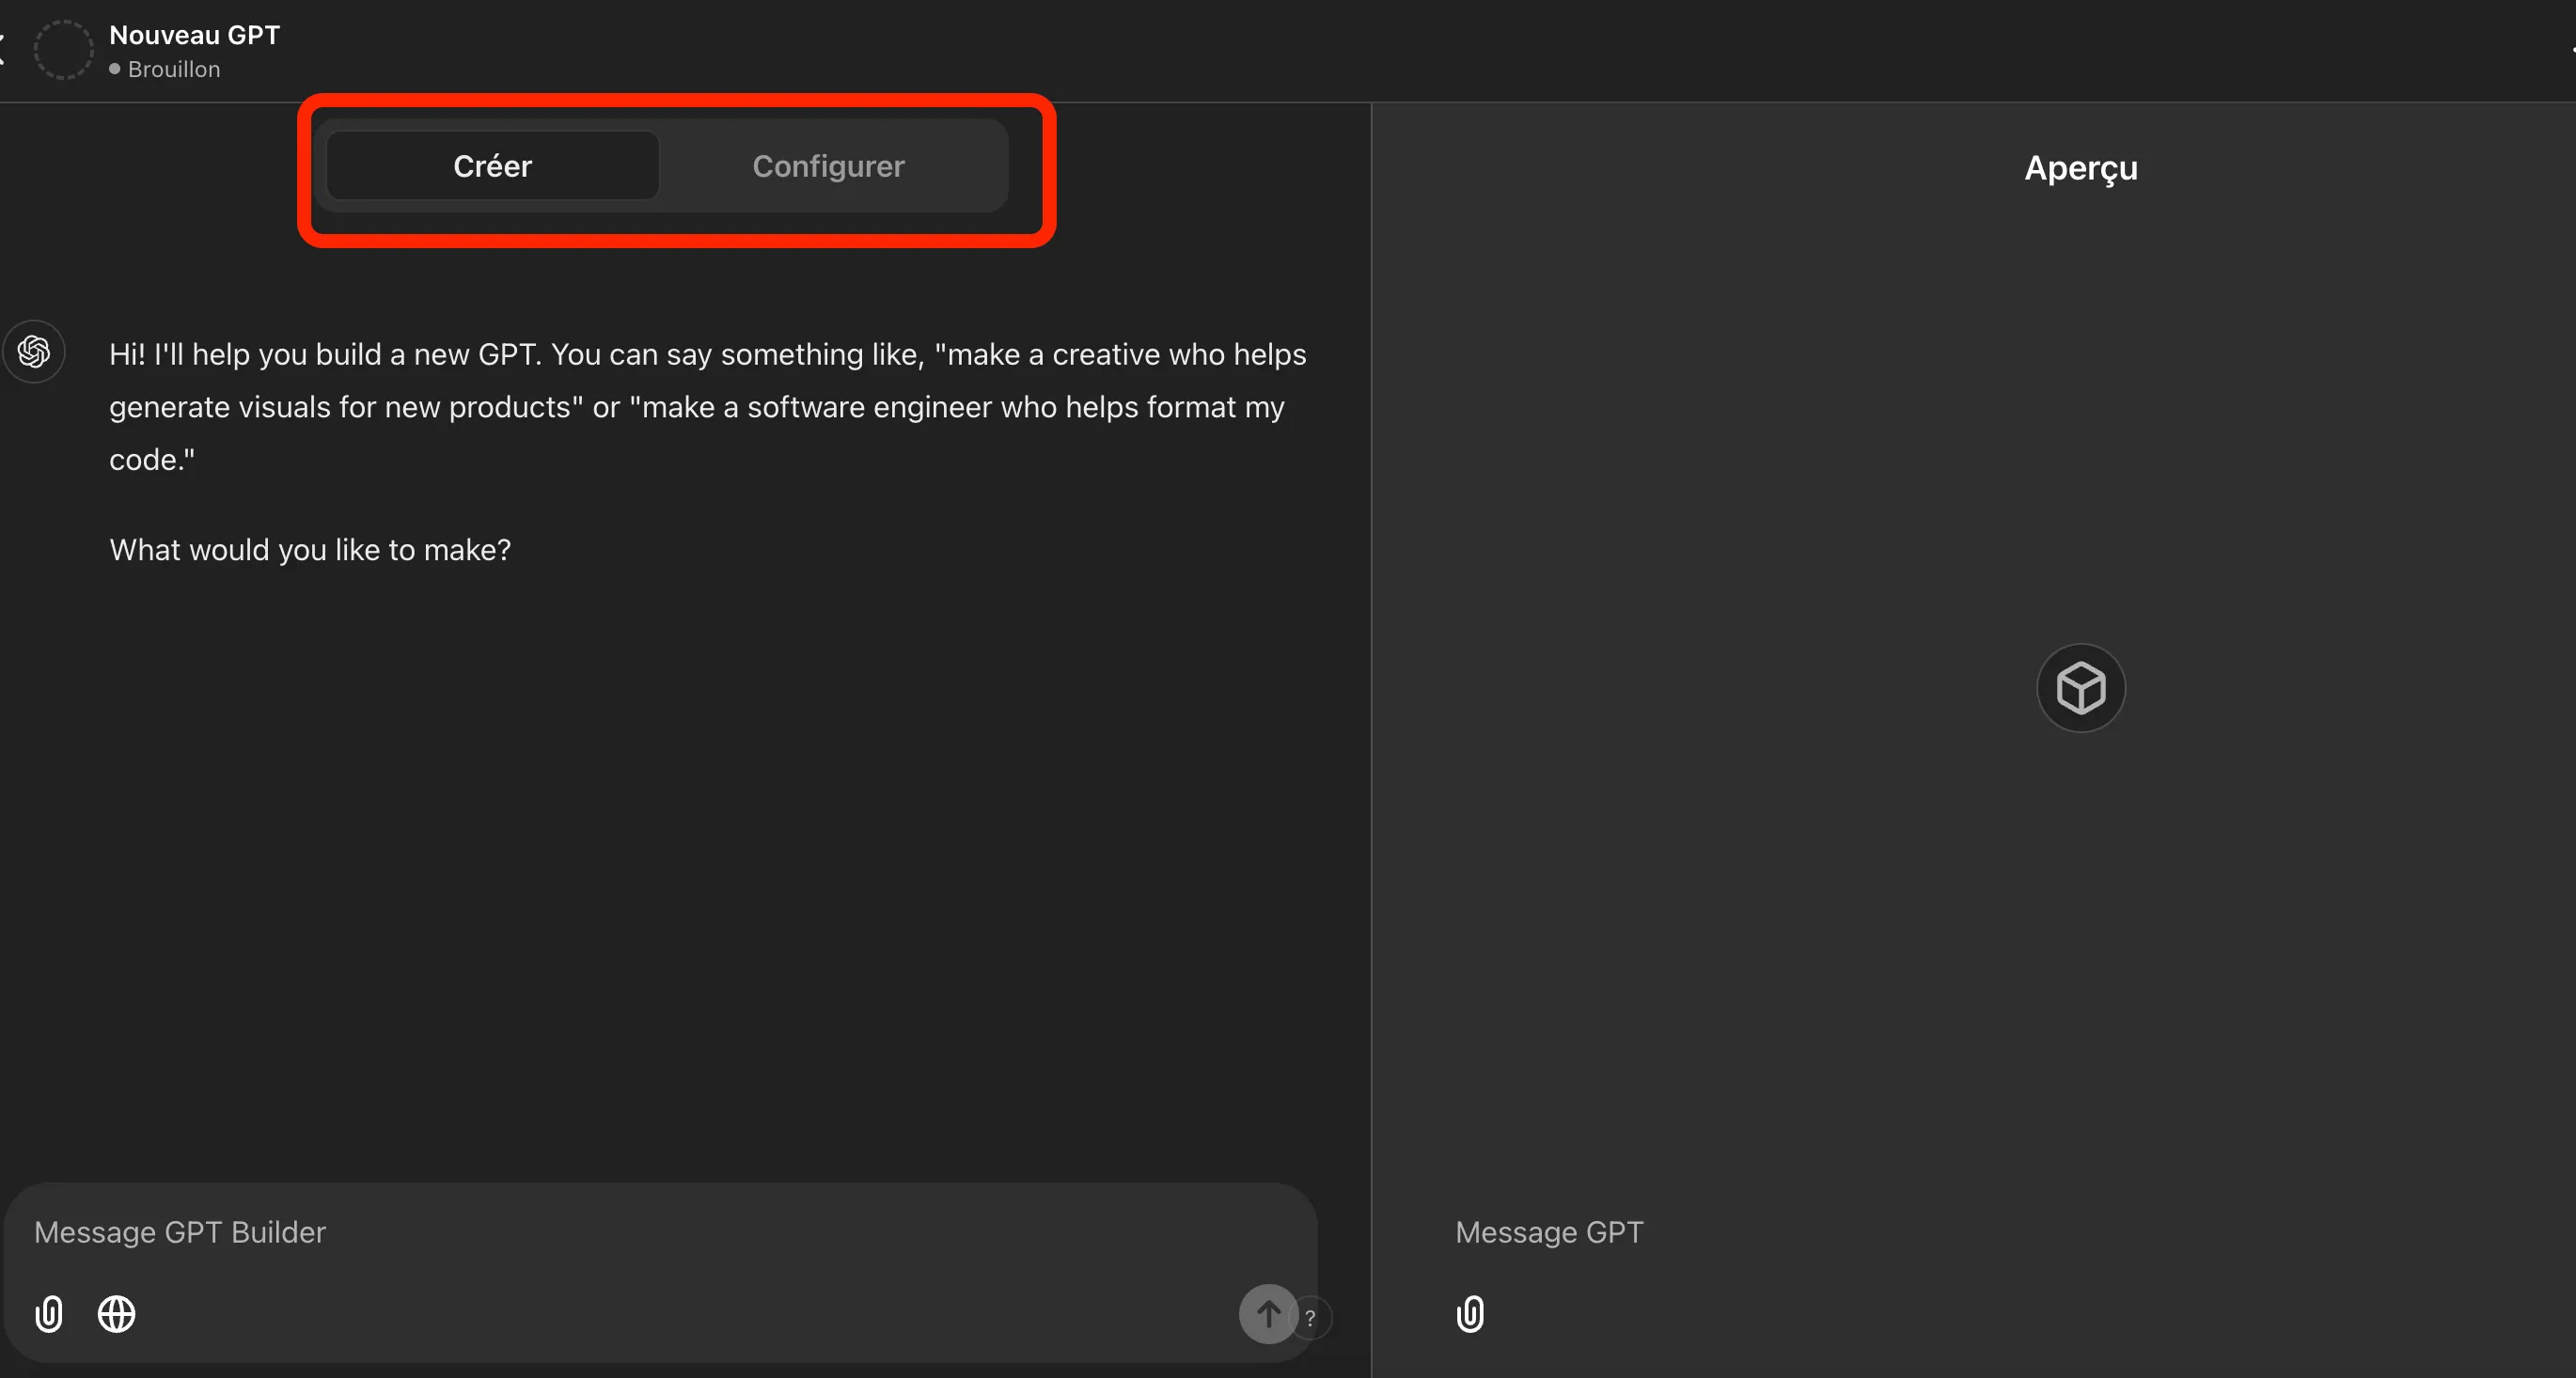
Step 2: Configure your GPT
We will now focus on the left window, specifically on the configuration part.
Instead of letting the chat guide you, we’ll go straight to the essentials:
- Provide a precise prompt that you’ve already prepared.
- Add clear and detailed instructions in the “Knowledge base”.
GPT configuration
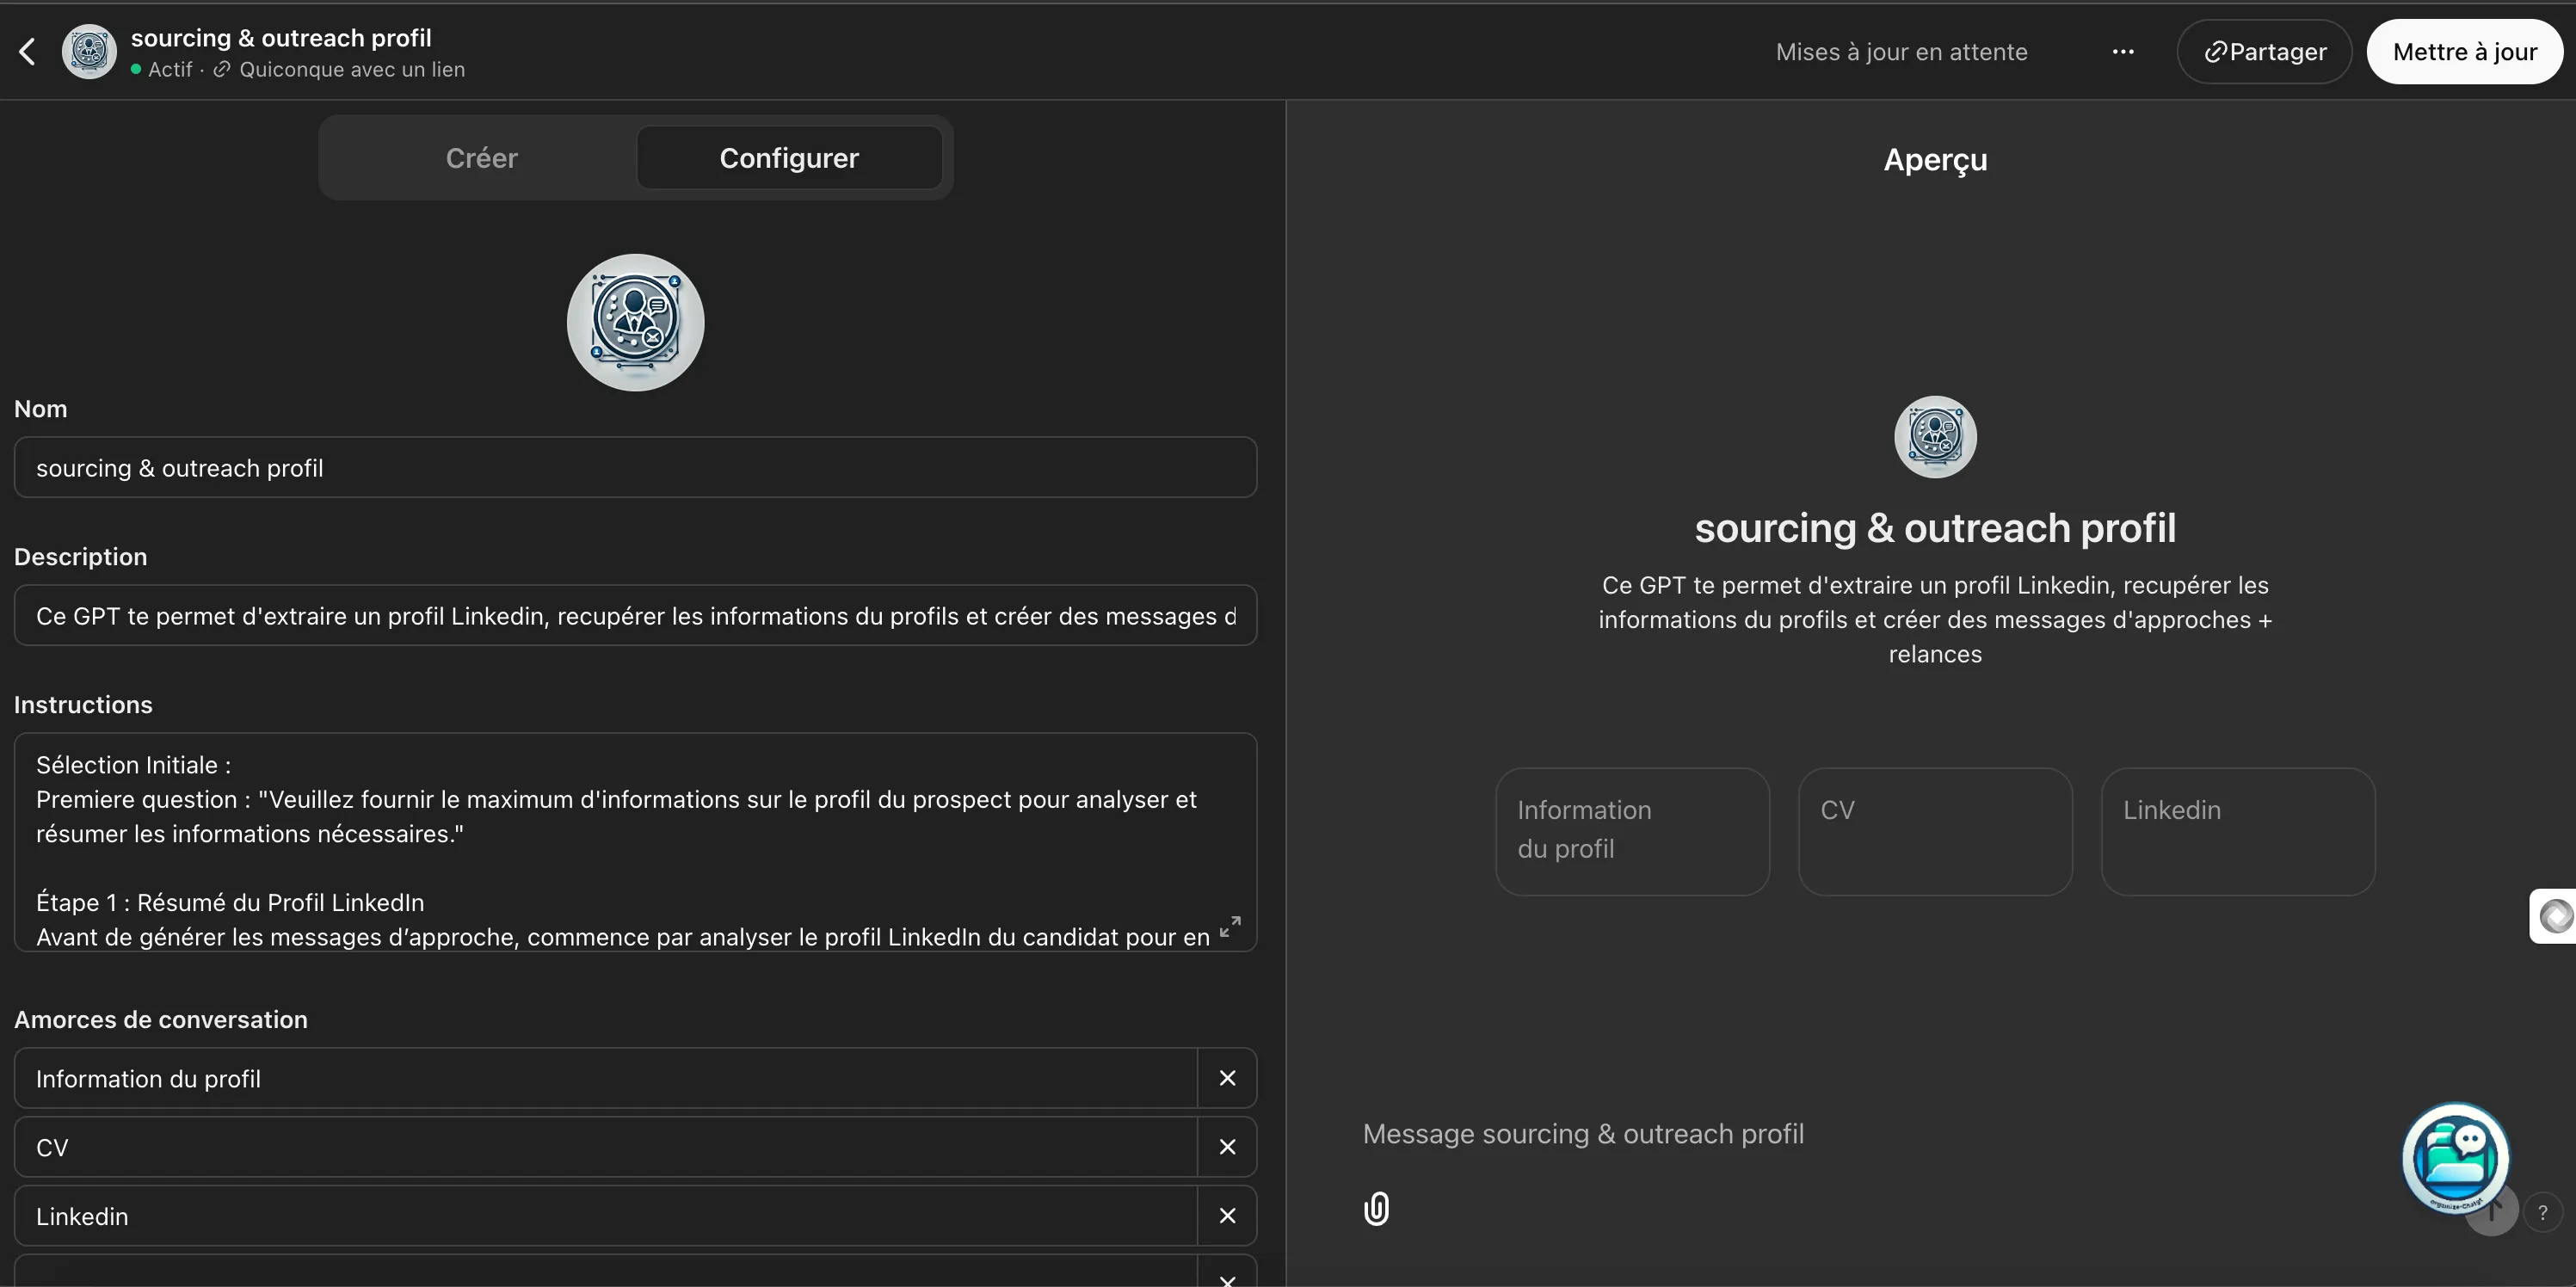
Here’s how to configure your GPT, step by step. These settings are key to making your GPT effective and customized.
- Name ⇒ Simple, explicit. Choose a name that describes what your GPT does.
- Description (optional) ⇒ A quick summary of what your chatbot can do. Ideal for keeping an overview when you have several.
- Instructions ⇒ This is your main prompt. The better you define what it should do, the more performant it will be. Every word counts.
- Conversation starters ⇒ These are conversation beginnings that the user can select. Think of frequent questions or phrases that will easily start exchanges.
- Knowledge base ⇒ Upload your files (PDF, CSV…) and specify the topics it should know about. Your GPT will draw from this to respond accurately.
💡 Don’t forget to reference your files well in your prompt instructions.
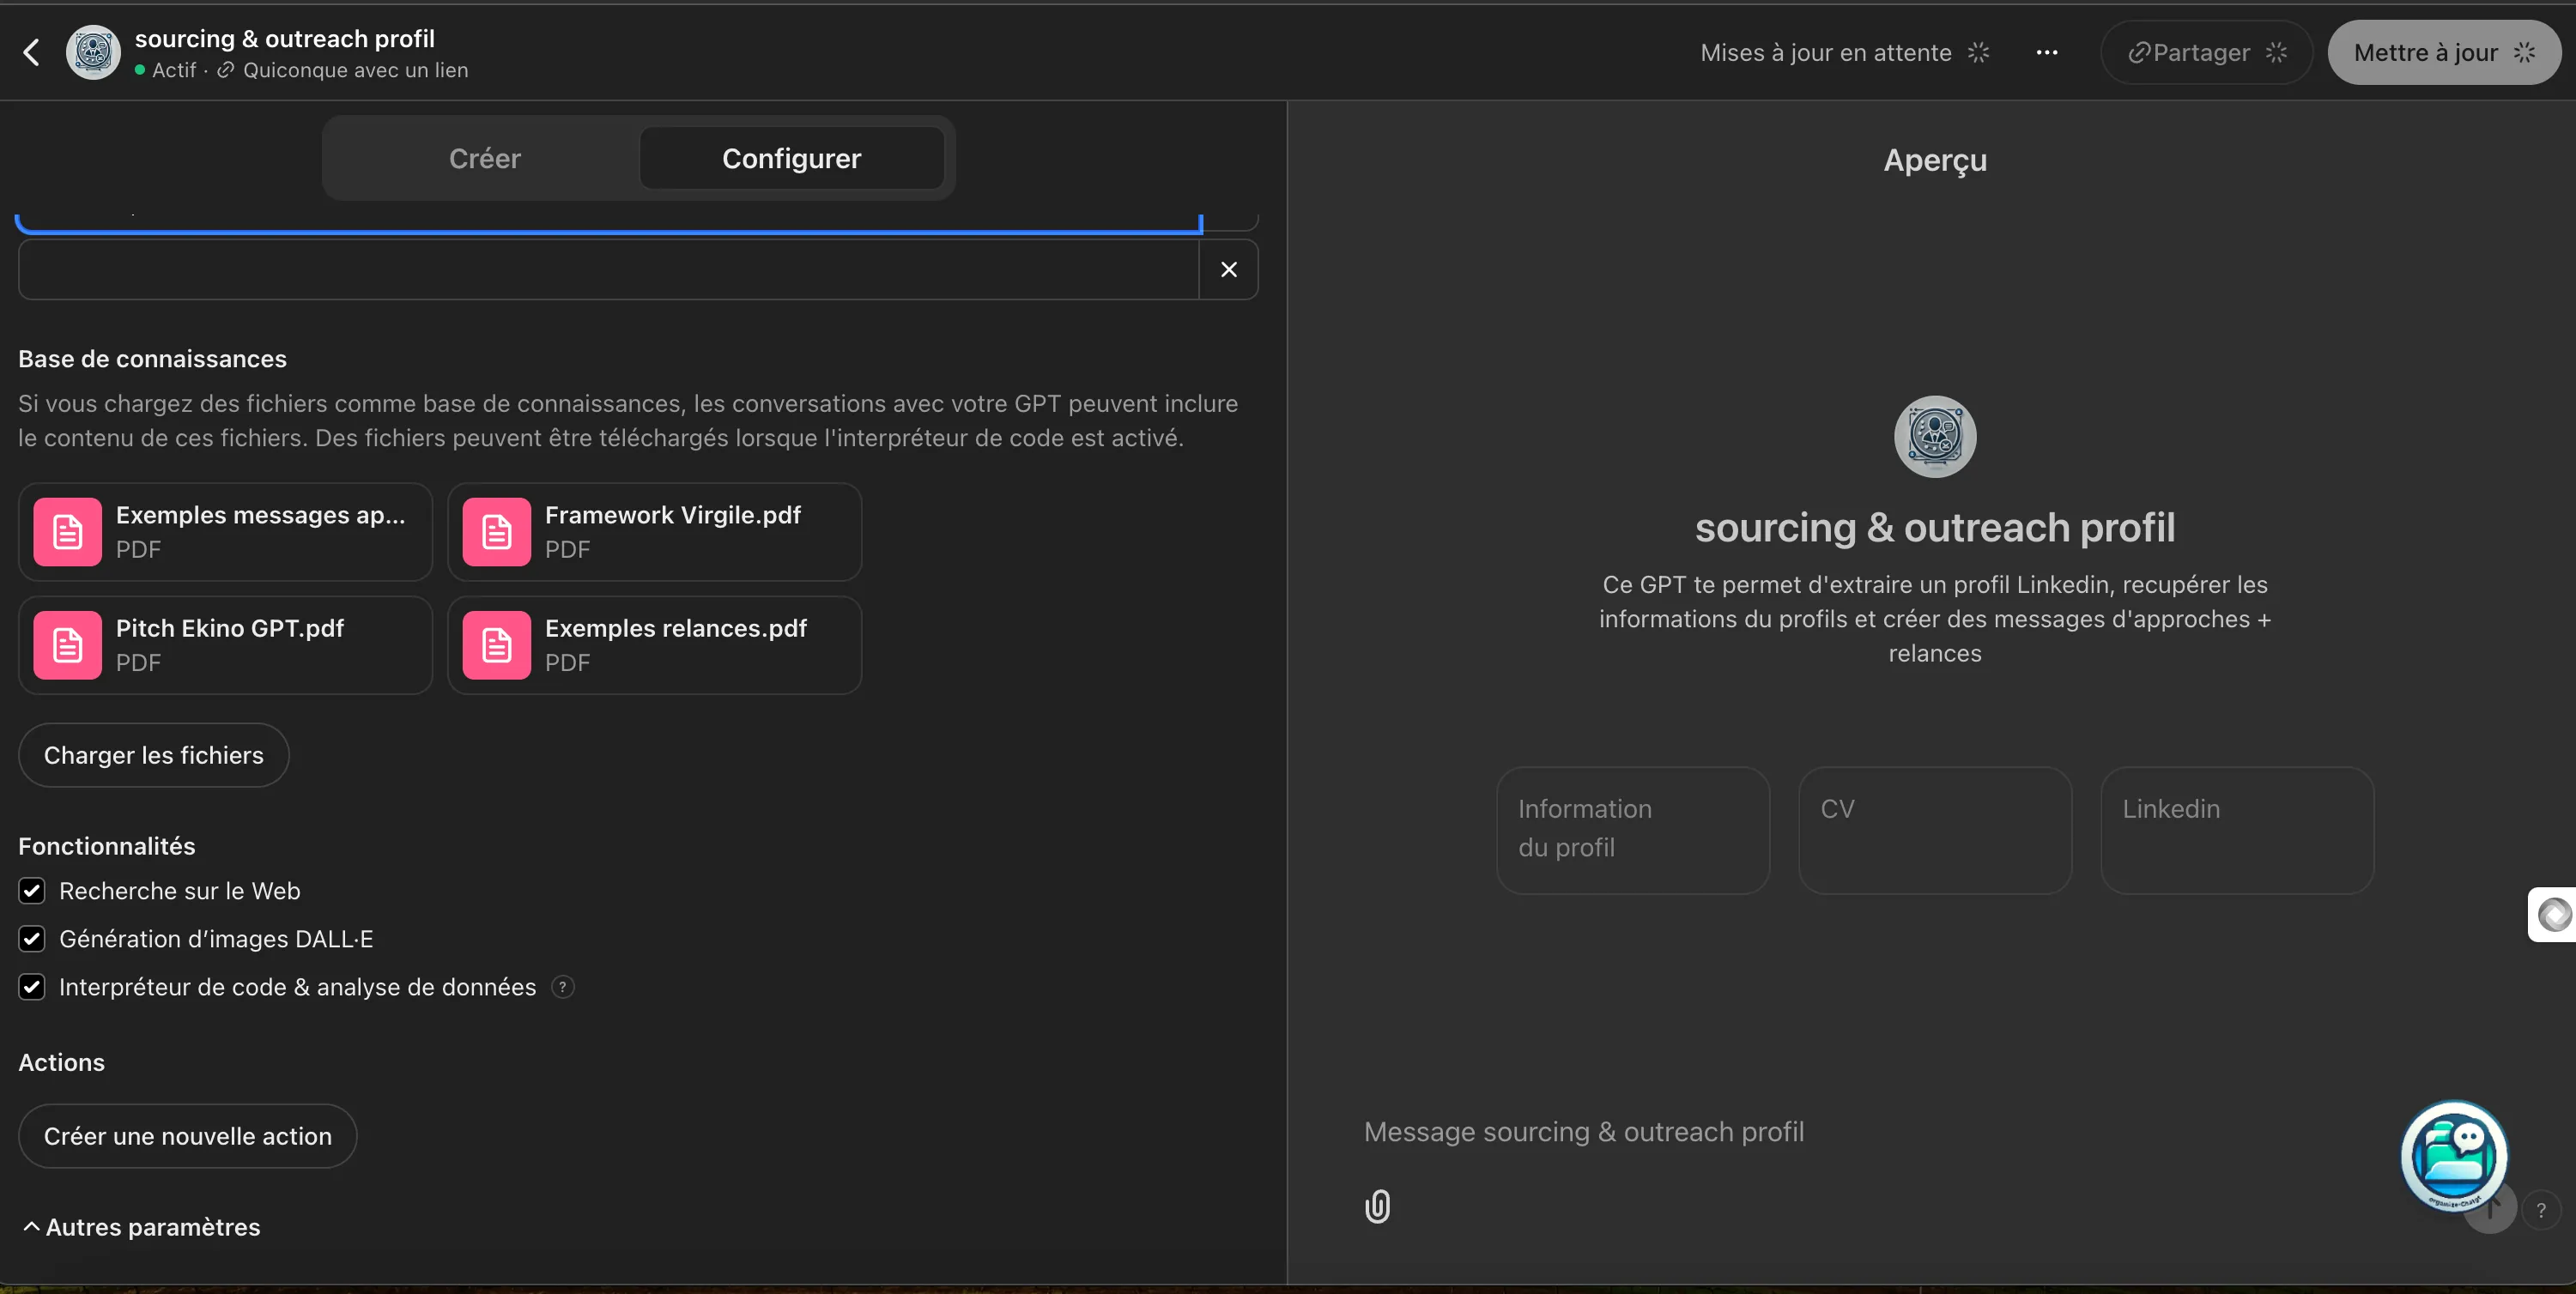
In my example, I uploaded PDFs:
- Company pitch: Document with key info about my company (who we are, what, why, teams, projects, benefits, USP…)
- Frameworks: Like AIDA, PAS, 4.P to structure messages.
- Message types: Real examples of outreach and follow-up messages.
💡 I tried making a single GPT to handle both candidate and client outreach messages, but it wasn’t optimal. Result: two distinct GPTs, each with its specific knowledge base, is more effective.
- Features ⇒ Activate all features (interpreter: mandatory for adding files)
- Create an action ⇒ For now, you don’t need to touch this part. But it’s very powerful (we’ll see that later).
Create an action: The true power of your GPT
With “Create an action”, you configure your GPT to interact with external services, APIs, or even retrieve real-time data. A real plus for automating advanced tasks.
You’ll give the GPT superpowers:
- Query external databases: Get real-time information directly from a database.
- Perform advanced operations: Send data to other platforms, trigger actions in a CRM, or automate with tools like Make or Zapier.
A use case to understand
Scenario: Retrieve live information from an external database (Airtable) of RecOps tools.
Step 1: Authentication
Give the GPT secure access to the external database. Your API key will link the two systems.
Step 2: Define a JSON schema
Create a JSON so your GPT knows what to look for (for example: name, description, price, features…).
Step 3: Interact with your chatbot
Your GPT will then be able to automatically query this database and deliver the requested information.
💡 This is exactly what BOLT, Stan’s RecOps assistant, does to find you the best tools on the market. 😉
(Quick aside: If you’re passionate about RecOps, automation, and tools, I recommend subscribing to Stan’s newsletter. It’s “full of value”. Subscribe here ⇒ RecOps)
Example of results
As a reminder, I specified in my prompt instructions:
- Generate 4 examples of approach messages
- Generate 2 follow-up messages
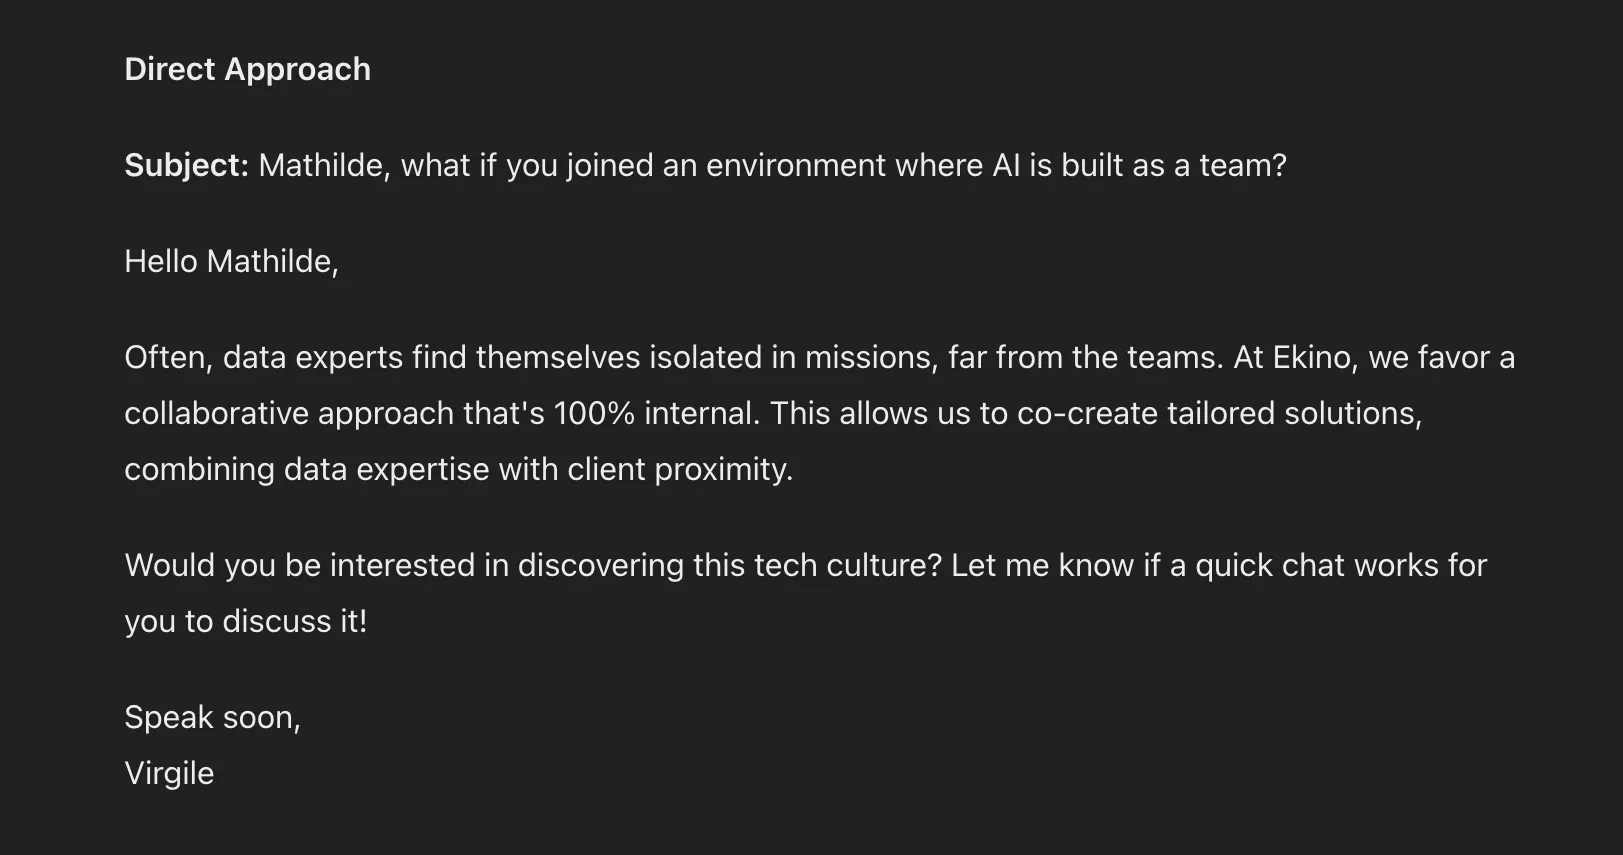
Here are some examples of the results obtained:
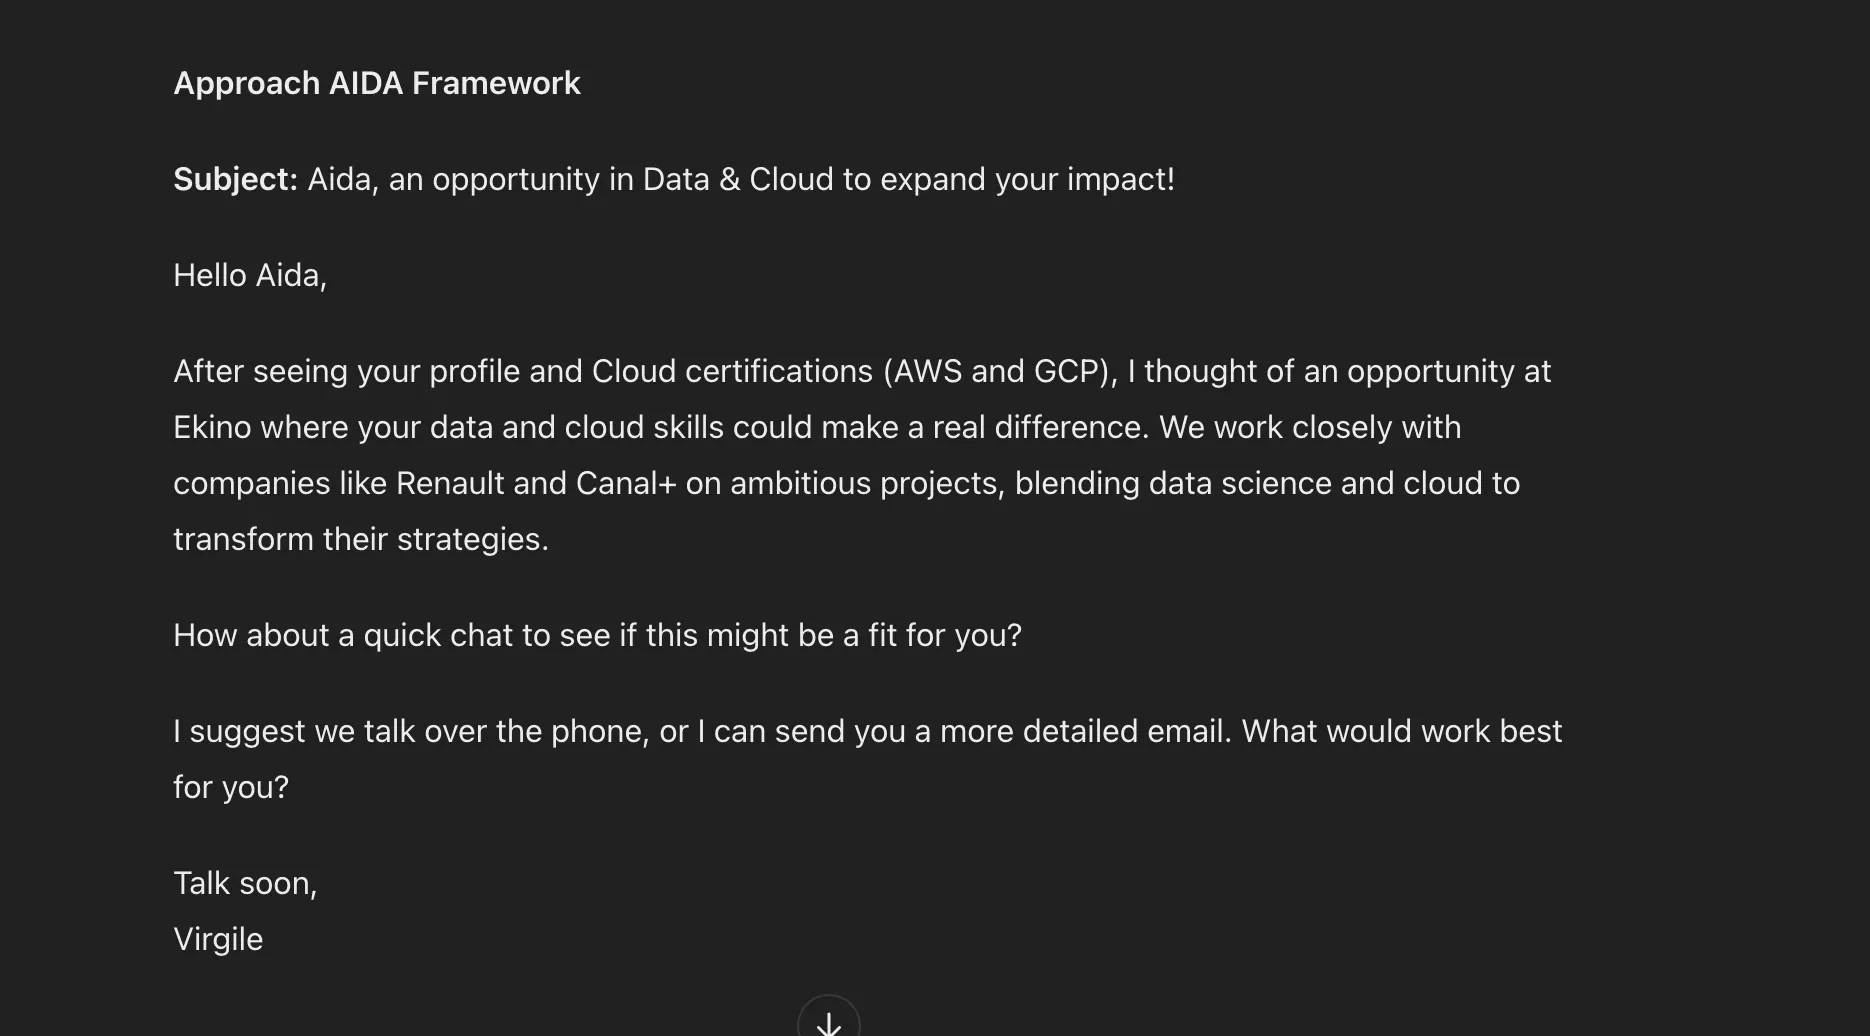
💡 This message was generated following my instructions. For example, I notice:
- Use of proven frameworks
- Personalization based on LinkedIn profile information
- Integration of my company information
- Call to action using the directed choices technique
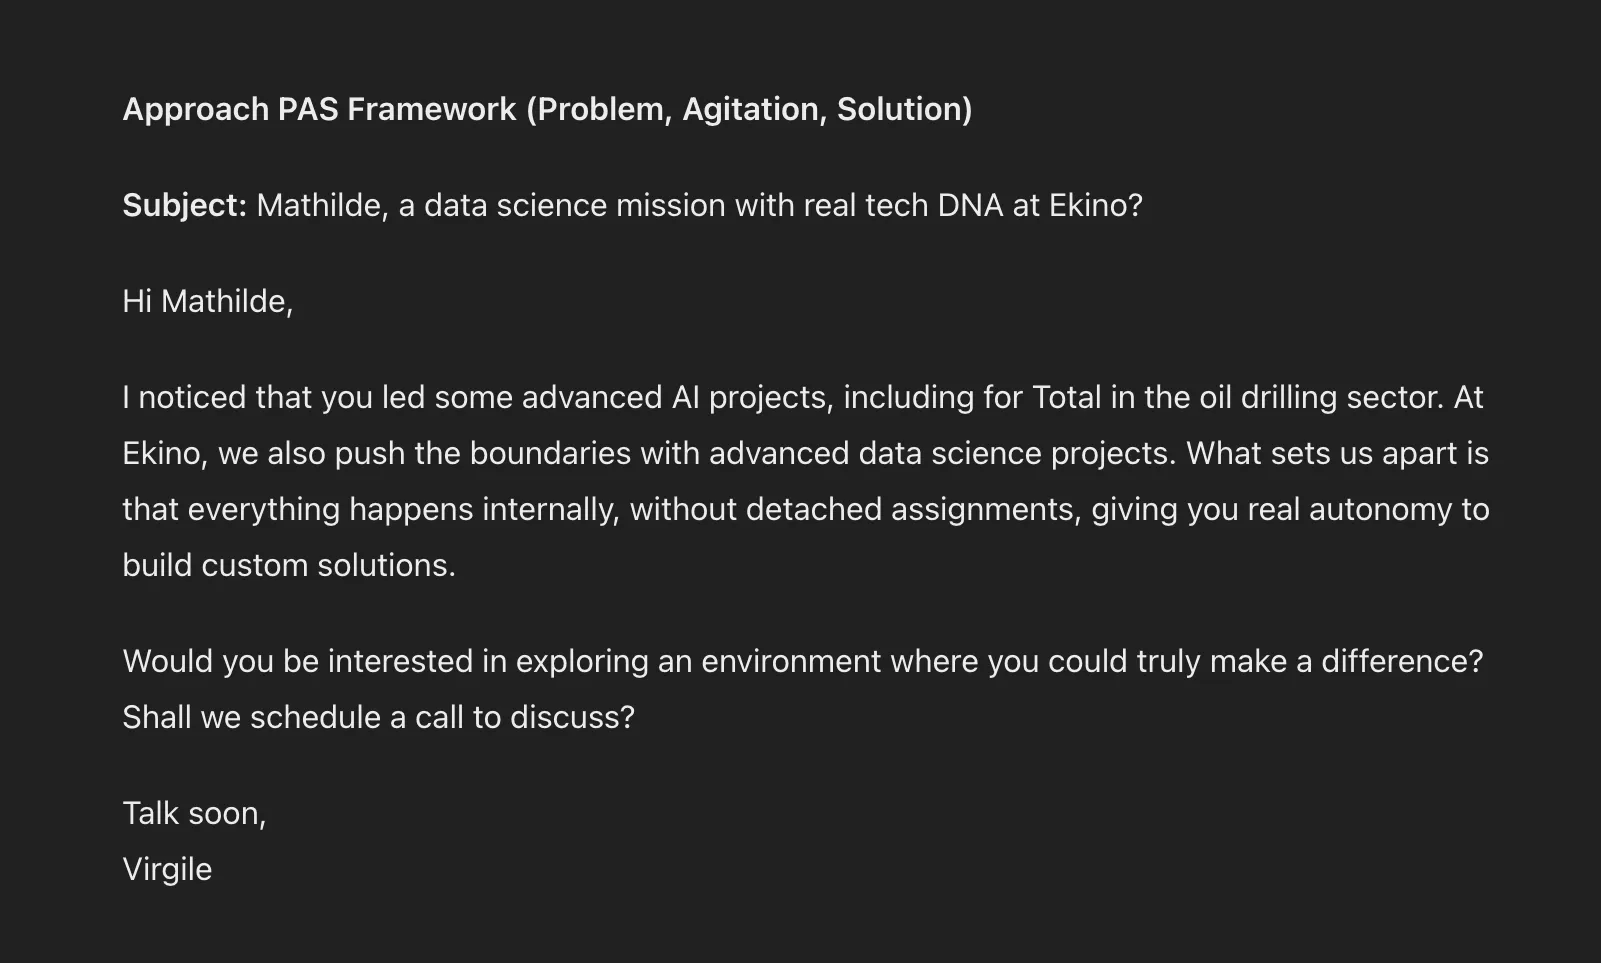
💡 This message also follows my instructions:
- PAS framework
- Personalization based on LinkedIn profile
- Use of a pain point from my persona info:
Your GPT is an extension of your expertise.
The more relevant data you provide it, the more precise and effective it becomes.
It’s like having an assistant who continuously learns and improves every day.
Save everything with Jarvi
After generating your approach messages with your GPT, the next step is to save and dynamize them in Jarvi. Your ATS that goes further in campaign management.
With Jarvi, you can transform each message created by your GPT into a dynamic template.
What does that mean?
Jarvi allows you to easily create multi-channel campaigns. Here’s what you can do:
- Save your messages as dynamic templates, with custom variables for each contact: first name, target company, seniority, specific tags, location, etc.
- Automate sending across multiple channels to maintain presence on LinkedIn, WhatsApp, email, and InMail.
- Track your campaign KPIs to give you a precise view of the effectiveness of each message. You can see sourced profiles, response rates by channel used, response rates by follow-up level, profile sources, etc.
With the combination of your custom GPT and Jarvi, you move from simple outreach messages to complete, totally scalable campaigns.
💡 To deepen your strategy on outreach messages and the art of prompting, I recommend checking out my article on AI-powered prospecting emails. I detail powerful techniques to optimize your messages and maximize your chances of getting a response.
Here’s the link: https://www.jarvi.tech/fr/blog/emails-prospection-ia/
If you have any questions or want to know more, don’t hesitate to contact me.
Virgile Ferrand
Linkedin: https://www.linkedin.com/in/virgile-f/ Email: virgileferrand.formation@gmail.com

.CA370pFk_Z18xiUa.webp)